When you take or download an excellent photo, while it is smaller than your desktop screen’s size, it can’t be a suitable wallpaper. You may wonder how to increase the resolution of an image in a hurry, for you don’t want to see this photo be useless. Don’t worry; Keep reading this article, and then you’ll learn 3 excellent ways to increase image resolution.
The Fastest Way to Increase Image Resolution Free Online
Why not increase the resolution of an image online for free? An online tool won’t take up your computer’s storage space, and it will be best if the photo editing website processes your photo quickly and without distortion. This website is AVAide Image Upscaler – quickly upload and increase your photo’s resolution, and then download it to your computer, totally free.
Step 1: Go to AVAide Image Upscaler and click the Choose a Photo button to upload a photo or multiple photos in Batches.
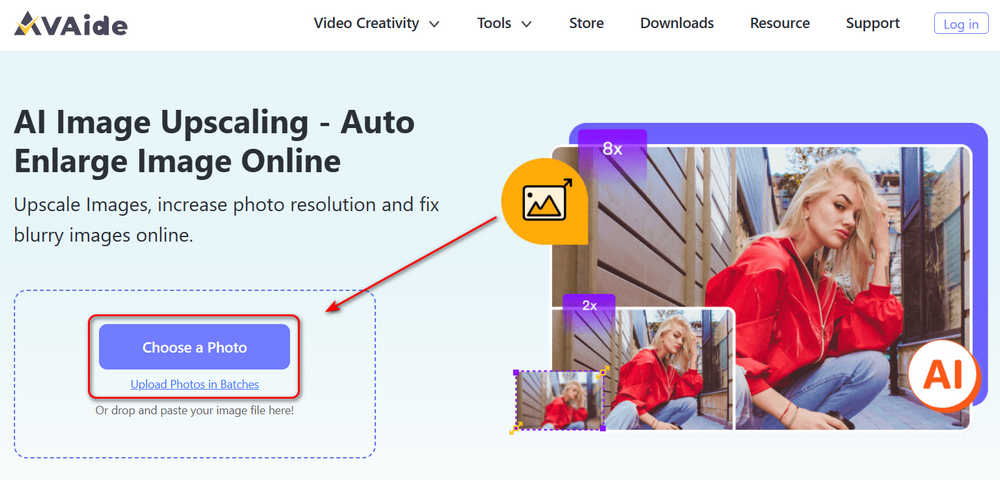
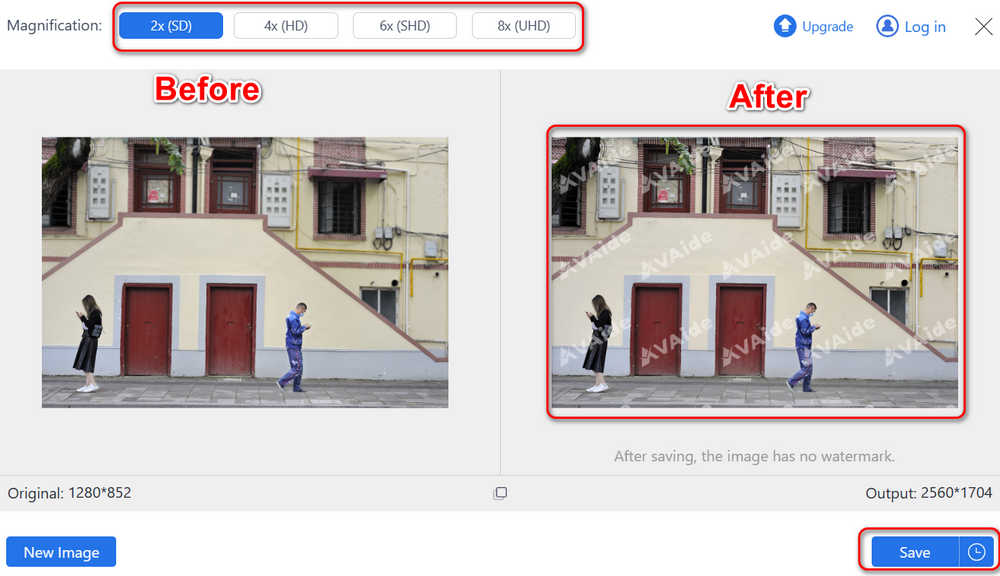
Step 2: Choose a magnification scale, such as 2x, 4x, or 6x. This website can increase a photo’s resolution by up to 8x. Check the image quality, then click the Save button to download it to your computer. That’s how easy it is with AVAide Image Upscaler.
Increase Image Resolution with Photoshop
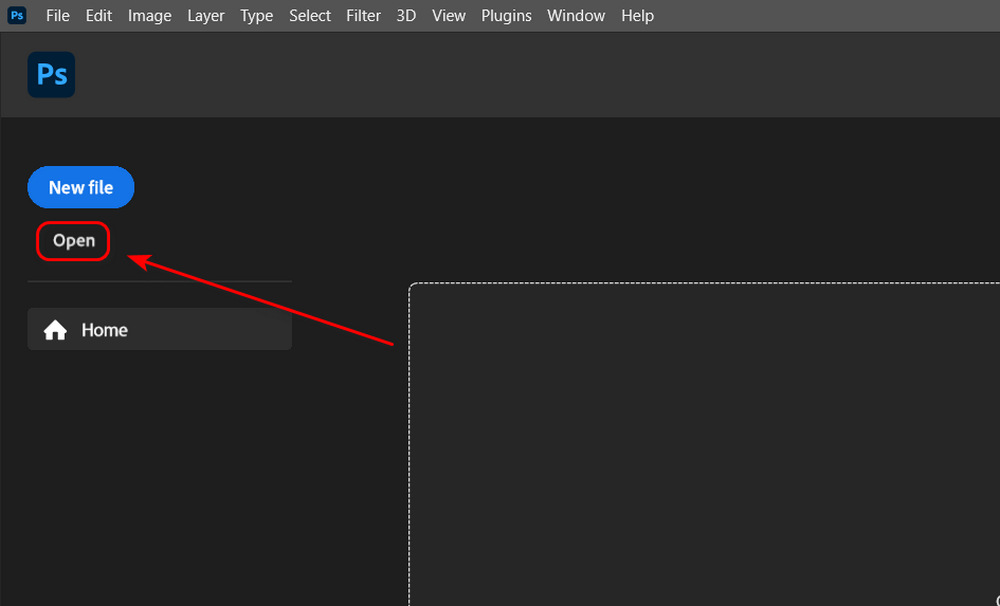
It’s also quite good to increase a photo’s resolution like a pro. That’s what the article will also show you – do it with Photoshop. Before you get started, you can also consider the money Adobe will take from you. Also, it won’t take many steps to increase the resolution of an image in Photoshop, which means that you won’t learn much about image editing.
Step 1: Open Photoshop on your computer, then click the Open button to import a photo to this program.
Step 2: Click the Image button on the top menu bar and then the Image Size button.
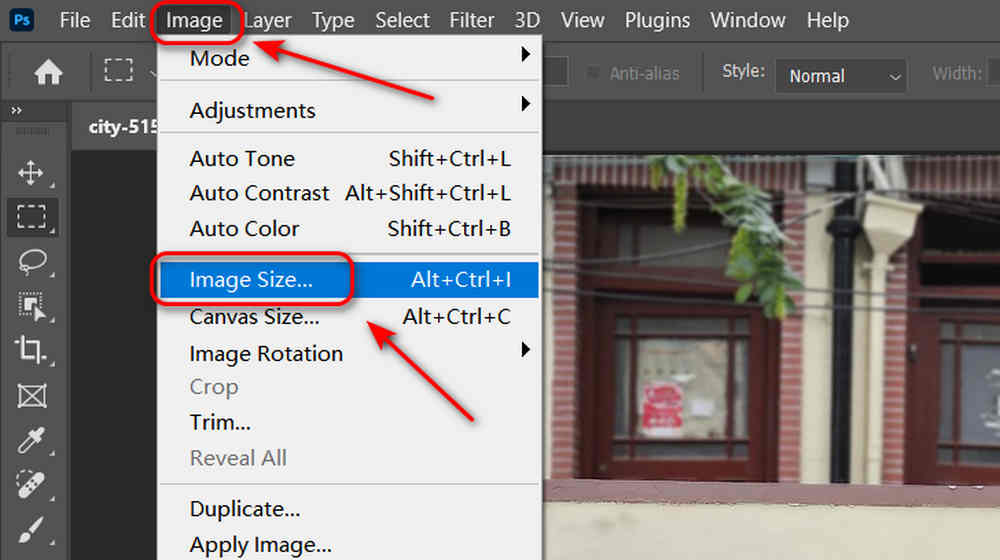
Step 3: In Photoshop, you need to increase a photo’s resolution to a fixed value in yourself. Enter your desired pixel value in the Width and Height boxes. For example, a 4K resolution is 4096 pixels in width, and then you can enter 4096 in the Width box. The Constrain button is turned on automatically so that your picture will retain the original aspect ratio. It can avoid distortion in a photo when its resolution is increased.

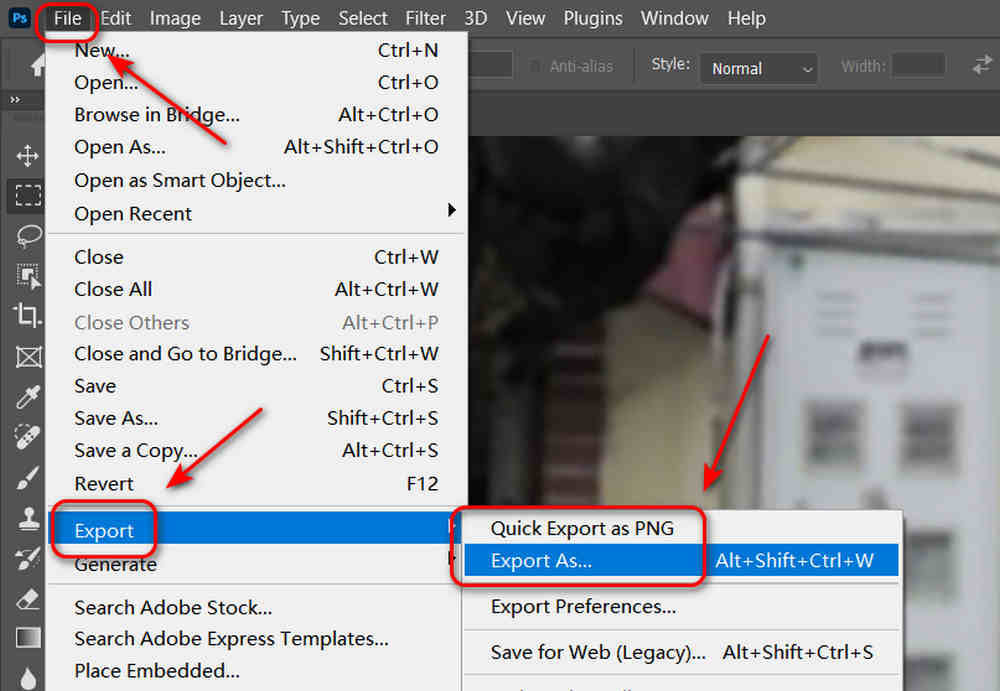
Step 4: Finally, click the File button in the top left corner and then the Export button. You can click the Quick Export as PNG button to quickly save the photo or Export As to save the photo in another format.
Use Illustrator to Increase Image Resolution
You can keep checking another powerful editing program that can help you increase the resolution of a photo – Adobe Illustrator.
This program focuses on creating pictures, logos, etc. It may be more challenging to use compared with Photoshop. However, you can improve your understanding of photo editing and become a deft creator if you never stop learning. Learning how to increase a photo’s resolution can be a barrier broker.
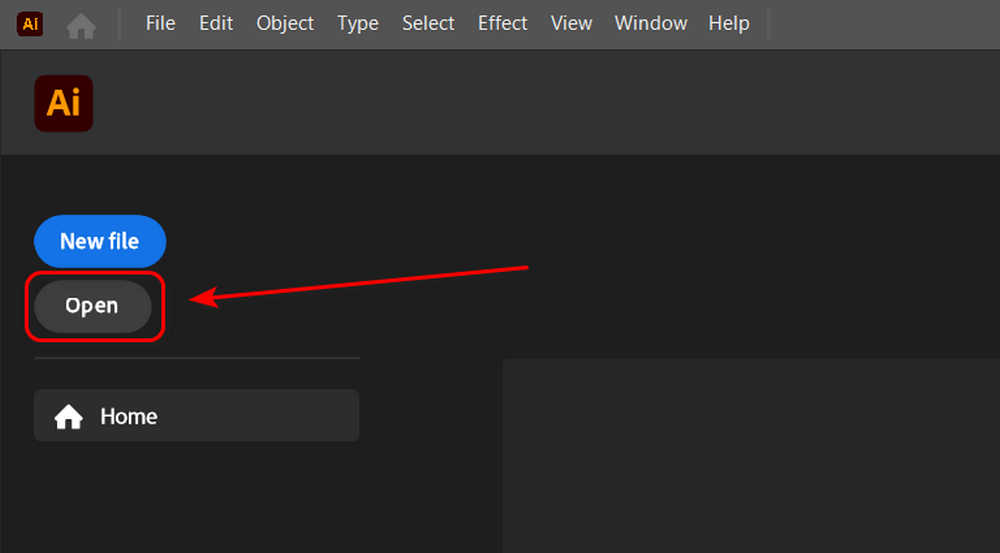
Step 1: Open Adobe Illustrator and click the Open button on the top left side to add a photo to this program.
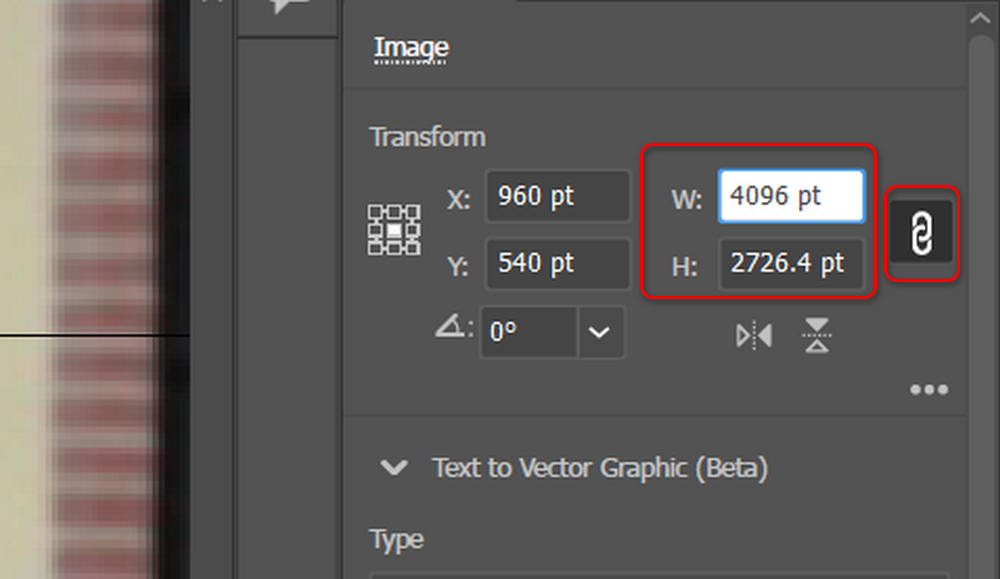
Step 2: Go to the right side of the window. Input a higher pixel value in the Width and Height boxes. Don’t forget to turn on the Maintain feature on the right side, which will automatically change the photo’s height after you change its width. In this way, there will be no distortion when you increase the image’s resolution.
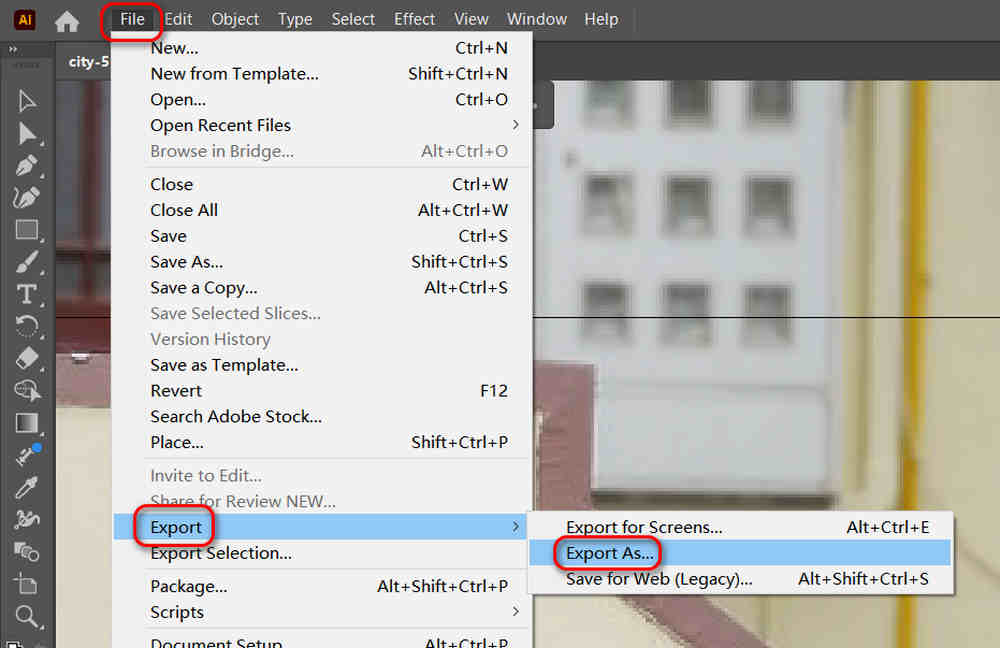
Step 3: Now, you need to save the photo. Click the File button in the top menu bar, then the Export button. Finally, click the Export As button to save it.
Benefits of Image Resolution Upscaling
It brings you benefits when you increase the resolution of a photo. Check them below to see if there’s something you haven’t known.
Change the Size
The most straightforward benefit is the size of a photo is enlarged. No matter what image resolution enhancer you use, a photo’s size is enlarged, and then you can make it your wallpaper on a desktop screen with the exact resolution. A photo whose resolution is increased is meant to fit a particular area.
A Clearer Photo
A photo will be clear after you increase its resolution. Although human eyes gradually can’t distinguish the difference when a photo’s resolution increases, you can find the photo crisper from 1080P to 4K. That’s why you should increase a photo’s resolution.
Protect Your Eyes
Friendly to Photo Editing
When you’ve increased a photo’s resolution, you’ll find it easier to edit this photo. A high-resolution photo can retain many details even if you zoom in on it. Then, you can edit this photo with more details, and it won’t cause distortion in the photo.
Conclusion
You’ve learned how to increase an image’s resolution in 3 ways. Photoshop and Illustrator are not easy to use, but they can help you get started with photo editing learning. However, if you urgently need to increase a photo’s resolution, you can resort to AVAide Image Upscaler, which can quickly and efficiently fulfill the resolution increase on your photo.


Be First to Comment